
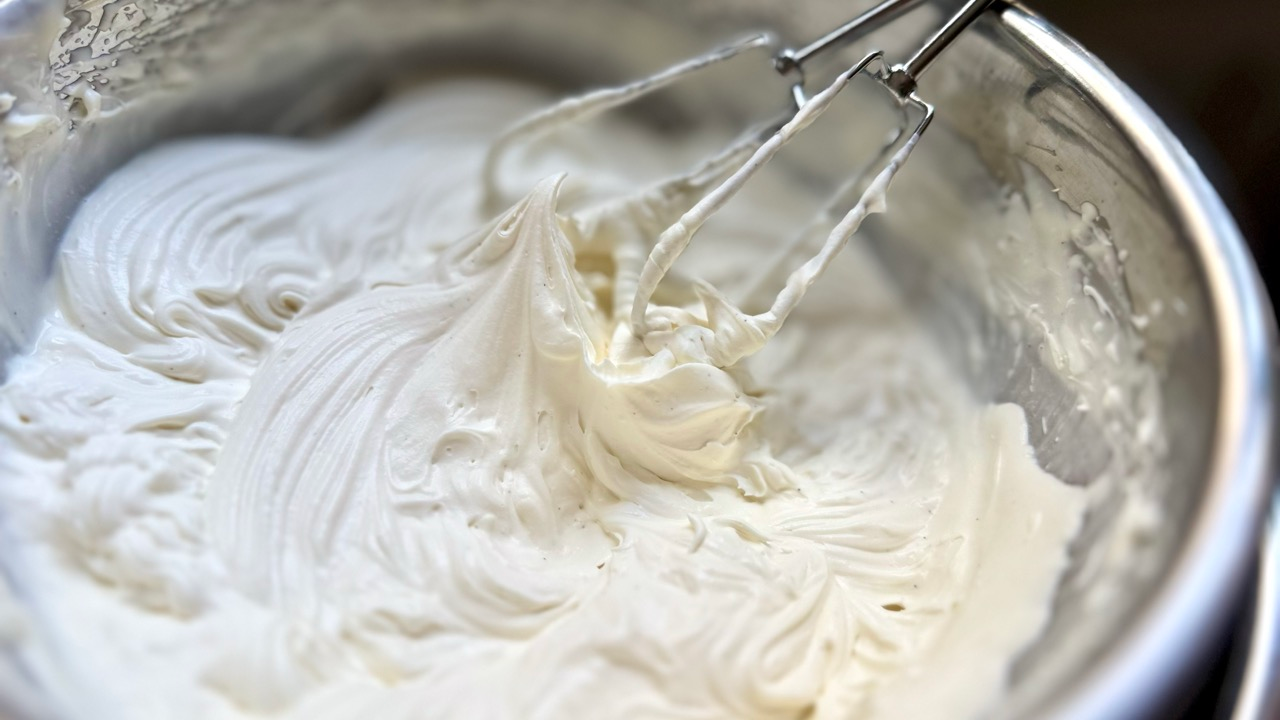
I have learned many variations of whipped cream over my pastry career. Now, I have a few go-to formulas depending on the dessert. Most whipped cream I make for restaurant-plated desserts is simple and light. It is made fresh on the day without stabilizers, allowing it to pair softly with warm fruits or delicate tarts.
However, bakery and cake shop standards are quite different. Bakery cakes need to hold their shape in a display case for hours. They also must travel safely to a client’s home. That requires a stabilized whipped cream.
This recipe brings professional bakery stability into your home kitchen. It uses simple ingredients and basic techniques to create a silky, long-lasting cream.
Why You’ll Love This Recipe

- Silky Smooth Texture: This cream holds sharp piping lines without turning grainy or heavy.
- Make-Ahead Friendly: You can prepare the liquid base two days in advance. Simply whip it when you are ready to decorate.
- Holds Up for Days: It keeps its structure without weeping, deflating, or melting at room temperature.
When to Use Stabilized vs. Regular Whipped Cream

Choosing the right whipped cream comes down to time and structure:
- Use Regular Whipped Cream: Choose this option for desserts served immediately. It works wonderfully over warm fruit crisps, freshly baked pies, or hot cocoa.
- Use Stabilized Whipped Cream: Pick this option when frosting layer cakes, filling cream puffs, or piping detailed borders. It easily sits out during events without losing shape.
Vanilla Bean Paste vs. Vanilla Extract

Nothing beats fresh vanilla beans when making a vanilla-forward recipe. Infusing seeds into warm cream produces an incredible flavor. However, whole beans are quite expensive today. Because of this cost, most pastry shops rely on vanilla bean paste.
Vanilla bean paste offers a richer aroma than standard liquid extract. It also adds beautiful, tiny black seeds throughout your cream. While paste used to be hard to find, you can now purchase it online or at specialty markets. Liquid vanilla extract still works as a substitute, but paste creates a true bakery finish.
📋 Ingredients

- 118g Heavy Cream (A)
- 40g Granulated or Caster Sugar
- 5g Vanilla Bean Paste (or pure vanilla extract)
- 4g Gelatin Sheets (or 3.5g Knox powdered gelatin bloomed in 1 tbsp / 15g cold water)
- 308g Heavy Cream (B), cold
👩🍳 Step-by-Step Instructions
Step 1: Prepare the Gelatin & Base Mixture

- Bloom the Gelatin:
- If using gelatin sheets: Submerge the sheets in a bowl of ice-cold water for 5–10 minutes until soft and pliable. Squeeze out excess water thoroughly and set aside.
- If using powdered gelatin: Sprinkle the powder evenly over 1 tablespoon of cold water in a small dish and let sit for 5 minutes to bloom.
- If using gelatin sheets: Submerge the sheets in a bowl of ice-cold water for 5–10 minutes until soft and pliable. Squeeze out excess water thoroughly and set aside.
- Heat Cream (A): In a small saucepan, combine Heavy Cream (A), sugar, and vanilla bean paste. Bring to a gentle boil over medium heat, stirring to make sure the sugar dissolves completely.
- Melt Gelatin: Remove the saucepan from heat. Add your bloomed gelatin directly into the warm cream and whisk until fully dissolved and smooth.
Step 2: Combine and Chill (Crucial Step!)

- Combine: Pour the hot cream mixture into a large heat-safe bowl. Immediately pour in the cold Heavy Cream (B) and stir until well combined.
- Chill: Press a sheet of plastic wrap directly onto the surface of the liquid cream base to prevent a skin from forming. Place in the refrigerator for at least 5 hours (overnight is ideal).💡 Chef’s Tip: Don’t rush this step! Gelatin needs cold temperatures to properly bond with the dairy fat so it can whip into a stable structure.
Step 3: Whip & Pipe

- Whip: Once the cream base is thoroughly chilled, transfer it to a chilled mixing bowl. Whisk using a hand mixer or stand mixer fitted with the whisk attachment on medium speed until it reaches smooth medium-to-firm peaks.
- Decorate: Transfer the whipped cream into a piping bag fitted with your favorite piping tip and use immediately to frost cakes, pipe onto tarts, or top your favorite desserts!
💡 Chef’s Tips for Success
- Keep It Cold: Make sure Cream (B) is cold straight from the fridge when adding it to the warm base. Cooling the mixture down before it hits the fridge speeds up the setting process.
- Watch the Whip Speed: Whip on medium speed rather than high. Medium speed creates smaller, more uniform air bubbles, giving you a significantly smoother finish that doesn’t look grainy.
🛠️ Troubleshooting & FAQ
Why did my cream turn grainy or curdled?
The Cause: Over-whipping! Gelatin-stabilized cream holds onto air quickly, and whipping on high speed for too long can push the fat solids to separate into butter.
The Fix: Don’t panic—this is usually fixable! Gently fold in 1 to 2 tablespoons of un-whipped cold heavy cream using a rubber spatula. The extra liquid fat will re-emulsify the mixture and smooth out the texture.
My cream isn’t whipping and remains liquid. What happened?
The Cause: Temperature is the #1 culprit here. If the cream base wasn’t chilled for the full 5 hours, the gelatin and butterfat haven’t had enough time to fully set and bond together.
The Fix: Pop your mixing bowl and whisk attachment in the freezer for 10 minutes, and ensure your cream base is ice-cold all the way through. Cold bowl + cold cream = quick peaks.
Why are there rubbery lumps of gelatin in my cream?
The Cause: The gelatin hit cold cream before it was properly dissolved, or Cream (A) wasn’t hot enough to melt it entirely.
The Fix: Next time, ensure Cream (A) reaches a gentle boil so the sugar and gelatin melt into a completely smooth syrup. Always whisk thoroughly right after adding the bloomed gelatin.
Can I freeze stabilized whipped cream?
Not recommended. While gelatin helps cream withstand refrigeration, freezing whipped cream causes the water inside to form ice crystals. When thawed, the cream will break, weep, and lose its smooth texture. Keep it refrigerated!

Stabilized Vanilla Chantilly Cream
Ingredients
- 118 g Heavy Cream A
- 40 g Granulated Sugar (or caster sugar)
- 5 g Vanilla Bean Paste (or pure vanilla extract)
- 4 g Gelatin Sheets (or 3.5g Knox powdered gelatin bloomed in 1 tbsp cold water)
- 308 g Heavy Cream B (ice-cold)
Instructions
Prepare the Gelatin & Cream Base
- Bloom the Gelatin: Submerge gelatin sheets in ice-cold water for 5 minutes until soft. Gently squeeze out excess water and set aside. (If using Knox powdered gelatin, sprinkle over 1 tbsp cold water and let bloom for 5 minutes).

- Heat Cream (A): In a small saucepan, combine Heavy Cream (A), sugar, and vanilla bean paste. Bring to a gentle boil over medium heat, stirring until the sugar is completely dissolved.

- Melt Gelatin: Remove the pan from heat. Add the bloomed gelatin directly into the warm cream and whisk until smooth and fully dissolved.

Combine & Chill
- Combine: Pour the hot cream mixture into a heat-safe bowl. Immediately pour in cold Heavy Cream (B) and stir until fully combined.

- Chill: Press plastic wrap directly onto the surface of the cream base to prevent a skin from forming. Refrigerate for at least 5 hours (or overnight) until thoroughly chilled.

Whip & Decorate
- Whip: Transfer the chilled cream base to a cold mixing bowl. Whisk on medium speed using a hand mixer or stand mixer until medium-to-firm peaks form.

- Decorate: Transfer into a piping bag with your favorite tip and use immediately to frost cakes, pipe borders, or fill pastries.

