
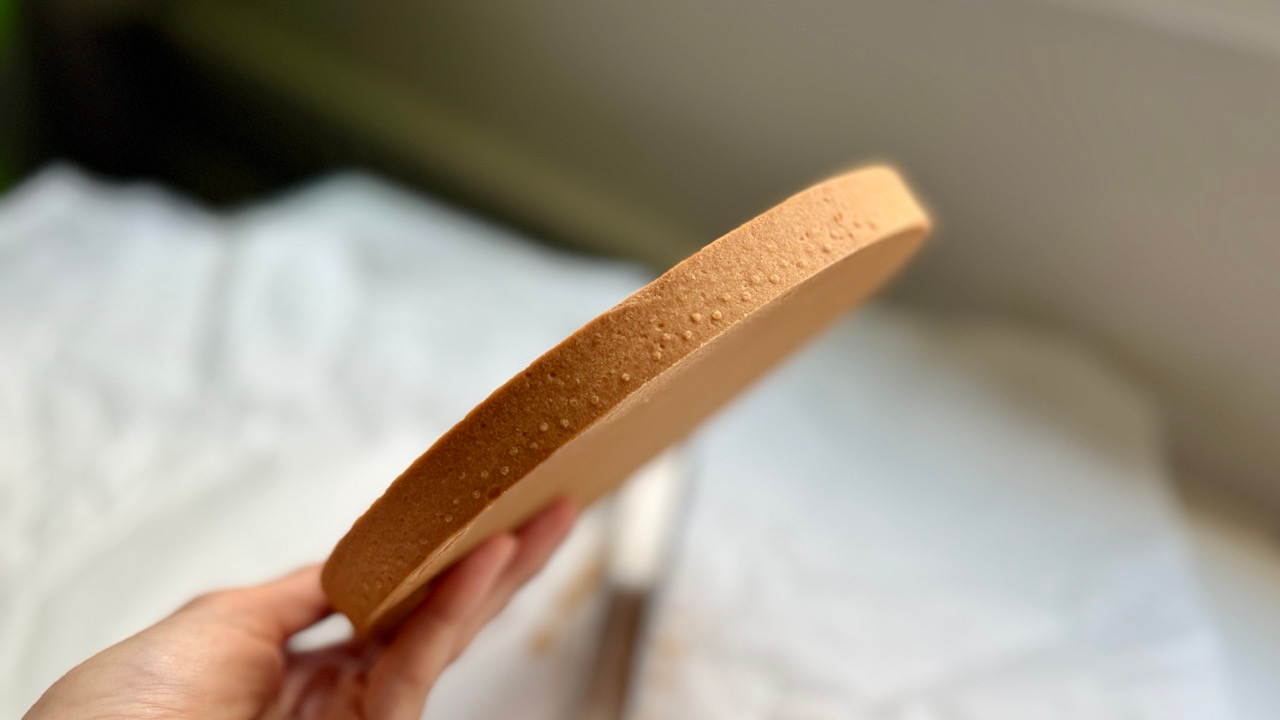
If you have ever struggled with shrinking pastry or soggy bottoms, this slump-resistant pate sucree tart shell recipe is designed specifically to solve those baking frustrations
Slumping, shrinking, and soggy bottoms are the three most common hurdles home bakers face when making French tarts. In this Pastry 101 guide, we are fixing all three.
Classic vs. Slump-Resistant: Which Dough Should You Choose?
If you have tried my Classic Pâte Sucrée recipe, you know it is rich, traditional, and incredibly tender. Both recipes are staples in my kitchen, but they serve different baking goals:
- Choose this Slump-Resistant Master Recipe if: You are using straight-walled or perforated tart rings, want thin 3–4 mm walls, need sharp 90-degree edges, and plan to fill the shell with fresh creams, curds, or fruits.
- Choose my Classic Pâte Sucrée if: You are baking in a traditional fluted metal tart pan, making a rustic thick-crust pie, or want a classic melt-in-your-mouth butter flavor for heavy, baked almond or chocolate fillings.
The Science of a Crisp Pate Sucree Tart Shell
Classic sweet tart crusts are loaded with heavy butter and sugar. While delicious, high sugar content lowers the melting point of the dough, making it prone to collapsing off the sides of the mold before the structure has time to set in the heat of the oven.
To solve this, we reformulated the classic ratios to create a dough that holds sharp 90-degree edges every single time:
- Lower Sugar (28% ratio): Reducing the sugar keeps the dough from softening too fast in the oven and prevents premature browning.
- Whole Egg (20% ratio): Whole egg provides structural egg proteins that coagulate quickly under heat, locking the vertical walls in place.
- All-Purpose Flour: Switching from cake flour to standard all-purpose flour provides just enough gluten network to give the wall structure strength without becoming tough.
Equipment Breakdown: What Molds & Baking Sheets to Use

You don’t need a professional bakery kitchen to get flawless results, but understanding how your baking gear handles steam and heat will dramatically improve your crusts.

My Personal Favorite: I prefer composite perforated tart rings (like the Silikomart 210mm ring). Unlike thin stainless steel rings, high-quality composite rings won’t bend out of shape or rust over time, and the micro-perforations let steam vent instantly so the sides stay straight and crisp without blind-baking weights.
Equipment Combinations Compared
| Setup | Bottom Heat & Steam | Wall Crispness | Overall Result |
| Perforated Ring + Perforated Mat + Perforated Sheet Pan | Maximum 360° airflow | Ultra-crisp | Gold Standard: Fast, perfectly even, zero bottom bubbling. |
| Perforated Ring + Perforated Mat + Standard Solid Sheet Pan | Great bottom steam release | Crisp | Best Home Setup: Highly crisp, professional results. |
| Perforated Ring + Parchment Paper + Standard Solid Sheet Pan | Good heat transfer | Crisp | Great Alternative: Parchment lets steam vent far better than solid silicone mats. |
| Standard Solid Tart Pan (Removable Bottom) | Traps steam under base | Moderate | Traditional: Dock the base well with a fork before freezing. |
Avoid solid silicone baking mats (like traditional Silpats) under tart rings whenever possible—thick silicone acts as an insulator, trapping steam under the crust and leaving the bottom soft or pale.
Master Recipe: Slump-Resistant Sweet Tart Dough

Yields one 21–24 cm (8–9 inch) tart shell or ~6 individual 8 cm tartlets.
Ingredients
- 110 g unsalted butter, cool but pliable
- 62 g confectioners’ sugar, sifted
- 45 g whole egg, beaten (approx. 1 small/medium egg)
- 1.8 g fine sea salt (about 1/3 tsp)
- 220 g all-purpose flour
2. Optional Sealing Finishes (Choose One)
Option A: White Chocolate Moisture Seal
Best for fresh fruit and diplomat cream tarts
- 10 g high-quality white chocolate, finely grated (containing cocoa butter) or Callebaut Mycryo cocoa butter
Option B: Double-Baked Egg Wash
Best for traditional, glossy, or savory tarts
- 1 egg yolk
- 1 tbsp (15 ml) heavy cream
Step-by-Step Guide to the Perfect Pate Sucree Tart Shell
1. Cream butter & sugar (No fluffy whipping):

Beat 110 g cool but pliable butter and 62 g sifted confectioners’ sugar with a paddle attachment or wooden spoon until completely smooth. Do not whip until light and fluffy. Trapping excess air bubbles in the butter causes the dough shell to puff up and distort in the oven.
2. Add egg & salt:

Add 45 g beaten whole egg and 1.8 g fine sea salt. Mix on low speed until just combined. If the mixture looks slightly broken or curdled, that is completely normal at this stage.
3.Add flour & chill flat:

Add 220 g all-purpose flour and mix on low speed only until the dough comes together and no dry flour remains. Press the soft dough into a flat square, wrap tightly in plastic wrap, and refrigerate for at least 1 hour (or overnight) until firm.
4. Roll, chill, & line your mold

Roll the chilled dough between two sheets of parchment paper to a uniform 3–4 mm thickness.
- Chill before cutting: Place the rolled dough sheet back in the refrigerator or freezer for 30 minutes. Chilling the rolled sheet makes the dough firm, clean to cut, and much easier to handle without tearing or stretching.
- Prepare your mold: Lightly coat the inside of your tart ring with oil spray or a thin film of butter to help the dough release cleanly.
How to Line a Perforated Tart Ring

Line using the two-piece strip method:

- Cut a round dough circle that is slightly smaller than the ring’s outer diameter and place it inside the base on your baking mat.
- Cut long, ribbon-like strips of dough slightly wider and longer than the inner walls of the ring (if one strip isn’t long enough, you can gently overlap and press two ribbons together).
- Line the ribbon around the inside wall of the ring.
- Gently push the bottom of the ribbon into the base circle to close any gaps and connect the bottom corners seamlessly. Trim any excess dough flush with the top rim using a sharp knife.
5. Freeze solid:

Place the lined tart mold on its baking sheet into the freezer for at least 30 minutes. Baking straight from frozen is the ultimate insurance policy against slumping—the outer surface of the dough sets under oven heat before the interior butter melts.

Trim any excess dough flush with the top rim using a sharp knife.
6. Bake to light golden

Bake straight from frozen at 160°C (320°F) on fan/convection mode. Because of the reduced sugar, this dough browns slightly slower than classic recipes, so judge readiness by color rather than strict time:
- If using the White Chocolate Finish: Bake completely until the shell is a uniform, rich golden brown (around 20–22 minutes).
- If using the Egg Wash Finish: Pull the tart shell out slightly earlier when it is just starting to turn light golden (around 18–20 minutes, depending on your oven and dough thickness) so it doesn’t over-brown during its second bake.
7: Smooth edges & apply seal

Let hot shells cool for 2 minutes until safe to handle. Gently rub the top rim and outer edges against the back of a fine-mesh sieve (or Microplane) to smooth any rough spots, then brush clean of crumbs.
- If using White Chocolate: Dust the hot base immediately, let melt for 60 seconds, and brush thin (see detailed guide below).
- If using Egg Wash: Brush the smoothed shell with egg wash and return to the oven at 160°C (320°F) for 8–10 minutes until deep golden.
Finishing & Sealing Options: Which Should You Use?
After filing down any small rim irregularities over a fine-mesh sieve and brushing away crumbs, choose the sealing method that best suits your tart filling:
Option A: The Egg Wash Finish
- Best for: Traditional tarts, baked fillings, or when you want a glossy, golden finish without added sweetness.
- How to apply: Whisk 1 egg yolk with 1 tbsp heavy cream. Brush a thin layer over the inside, rim, and outer walls of the pre-baked shell. Bake at 160°C (320°F) for 8–10 minutes until the wash bakes into a shiny, golden seal.
Option B: The White Chocolate Moisture Barrier
- Best for: Fresh fruit, diplomat cream, or lemon curd tarts where you want maximum crispness for days with zero extra oven time.
Plaintext
[ Remove Hot Shell from Oven ] ──> [ Dust with Finely Grated White Chocolate ] ──> [ Melt & Brush Thin Layer ]
- How to apply: Dust 10 g finely grated white chocolate (or Callebaut Mycryo) over the piping-hot base. Wait 60 seconds for it to melt from the residual heat, then use a dry pastry brush to coat the bottom and lower walls in a thin layer. Allow to set as it cools.
Two Ways to Line a Tart Ring
Method A: The Professional Two-Piece Strip Method
Best for perforated rings and ultra-sharp 90-degree angles.


- Cut out a circle of rolled dough using the base of your ring as a guide. Place it inside the ring on your baking mat.
- Cut long, straight strips of dough matching the height of your ring wall (e.g., 20 mm wide).
- Line the interior wall with the dough strip, gently pressing the bottom edge of the ribbon into the bottom disc to seal the seam smoothly.
Method B: The Classic Drape Method
Best for traditional tart pans with fluted or sloped sides.
- Roll dough ~5 cm wider than your mold.
- Carefully drape the dough over the top, then lift the edges while tucking the dough down into the bottom corners without stretching it. (Stretching dough causes it to snap back and shrink while baking).

Sweet Tart Shells (Pâte Sucrée)
Ingredients
Base Dough
- 110 g unsalted butter cool but pliable
- 62 g confectioners’ sugar sifted
- 45 g whole egg beaten (approx. 1 small/medium egg)
- 1.8 g fine sea salt approx. 1/3 tsp
- 220 g all-purpose flour
Optional Sealing Finishes (Choose One)
Option A (White Chocolate Seal):
- 10 g white chocolate finely grated (or Callebaut Mycryo cocoa butter)
Option B (Egg Wash Seal):
- 1 egg yolk
- 15 ml heavy cream
Instructions
- Cream Butter & Sugar: In a bowl with a paddle attachment or wooden spoon, mix 110 g cool but pliable butter and 62 g sifted confectioners' sugar until smooth. Do not whip until light and fluffy.

- Add Egg & Salt: Add 45 g beaten whole egg and 1.8 g fine sea salt. Mix on low speed until combined (it may look slightly curdled, which is normal).

- Add Flour & Rest: Add 220 g all-purpose flour. Mix on low speed only until the dough comes together and no dry flour remains. Press into a flat disc, wrap tightly in plastic, and refrigerate for at least 1 hour until firm.

- Roll & Chill Sheet: Roll the chilled dough between two sheets of parchment paper to a uniform 3–4 mm thickness. Place the rolled sheet in the refrigerator or freezer for 30 minutes to firm up for clean cutting.

- Line the Mold: Lightly coat your tart ring with oil spray or a thin film of butter. Cut a dough circle slightly smaller than the mold base and place inside. Cut long ribbon-like strips slightly wider than the walls.

- Line the inner edge, and gently press the bottom seam to connect the base and side dough.

- Freeze Solid: Place the lined tart mold on a parchment or perforated mat-lined baking sheet into the freezer for at least 30 minutes until frozen solid.Trim excess flush with the rim using a sharp knife.

- Initial Bake: Bake straight from frozen at 160°C (320°F) on fan/convection mode.

- For White Chocolate Seal: Bake completely until rich golden brown (20–22 minutes).For Egg Wash Seal: Bake until light golden brown (18–20 minutes).
- Smooth Edges & Apply Seal: Allow hot shells to cool for 2 minutes. Gently rub the top rim against the back of a fine-mesh sieve (or Microplane) to smooth rough edges, then brush away crumbs.

- White Chocolate Finish: Dust hot base immediately with 10 g grated white chocolate, wait 60 seconds to melt, and brush into a thin, uniform layer over the bottom. Let cool.Egg Wash Finish: Brush the shell with egg wash and return to the oven at 160°C (320°F) for 8–10 minutes until deep golden and set.
