
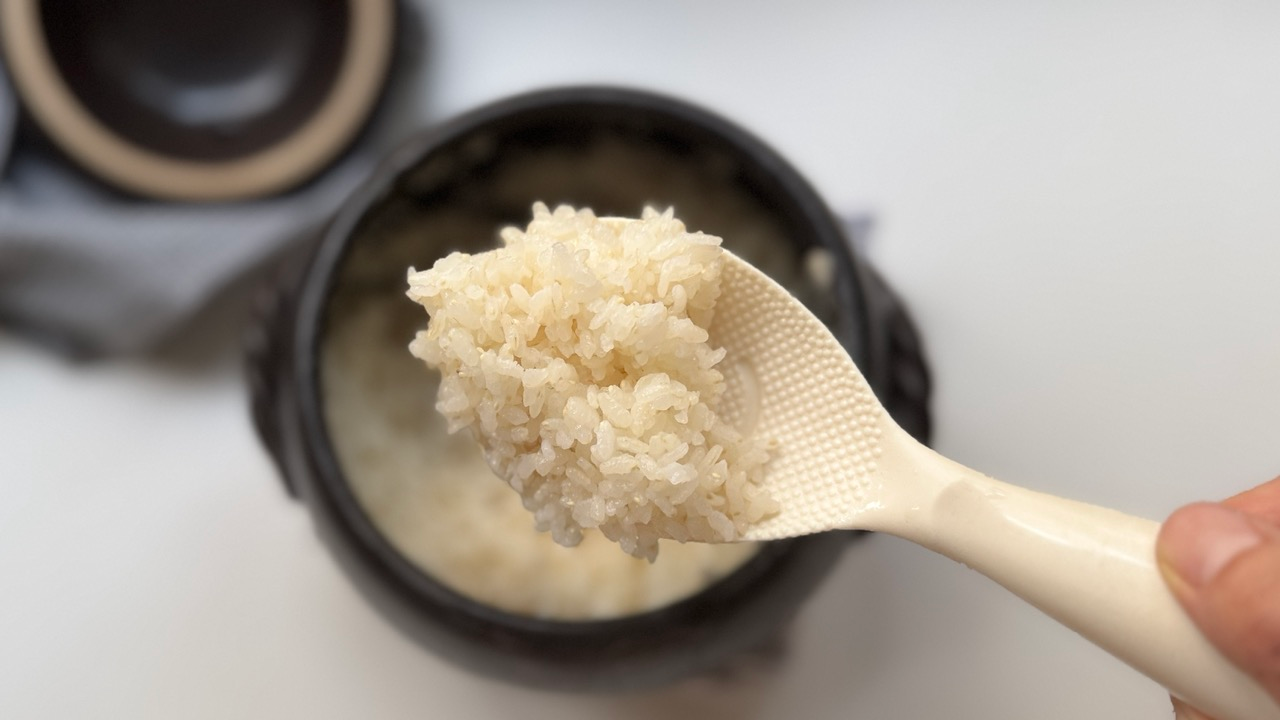
If you love the silky, tender texture of Japanese short-grain white rice but want the nutritional perks of whole grains, learning how to cook haiga mai (germ-retained rice) is the ultimate game-changer. I recently tested a bag of Tamaki Gold Kenko Haiga Rice, and the results were wonderful—fluffy, slightly nutty, and remarkably tender.

Haiga Mai is milled using a specialized technique that strips away 100% of the tough outer brown bran layer while leaving the nutrient-dense germ intact (aiming for over 80% germ retention). Developed in early 20th-century Japan as a natural way to prevent Vitamin B1 deficiencies (Beriberi) in the military, this “original functional superfood” gives you the easy digestibility and soft mouthfeel of white rice, packed with essential vitamins, minerals, and fiber.
Why Choose Haiga Mai? (Nutritional Highlights)

Because the germ remains attached to the kernel, Haiga Mai offers a major nutritional upgrade compared to standard polished white rice:
- 4x Vitamin B1: Essential for converting carbohydrates into steady energy.
- 4x Vitamin E: A powerful antioxidant that supports cellular health.
- 3.4x Magnesium & 2x Iron: Key minerals for muscle function and vitality.
- Boosted GABA (Gamma-Aminobutyric Acid): A natural neurotransmitter known to support mental calm and sleep quality.
Chef’s Tip on GABA: Soaking Haiga Mai for 45 to 60 minutes prompts the germ to “awaken,” boosting its natural GABA levels up to 4–5 times higher than standard white rice!
Key Ratios & Timing

Haiga Mai absorbs slightly more water than regular white short-grain rice. Because the delicate germ can easily break off during washing, a gentle hand is key.
| Ingredient / Setting | 1 US Cup (150g) | 2 US Cups (300g) | 3 US Cups (450g) |
|---|---|---|---|
| Rice | 150g | 300g | 450g |
| Water for Cooking | 150g –160g | 300g – 320g | 450g – 480g |
| Soak Time | 45 to 60 minutes | 45 to 60 minutes | 45 to 60 minutes |
| Rest/Drain Time | 15 minutes | 15 minutes | 15 minutes |
| Rice Cooker Mode | Quick Cook Mode | Quick Cook Mode | Quick Cook Mode |
Texture Note: If you prefer a firmer grain with a distinct bite, aim for 170g of water per cup. If you prefer a slightly softer, more yielding grain (or are cooking for family members who like softer rice!), aim closer to 180g.
Here is my tested step-by-step method for how to cook haiga mai in a rice cooker for perfect texture every time.
How to Cook Haiga Mai in a Rice Cooker (Step- by- Step)

Technically, the overall process is very similar to my guide on how to cook Japanese short-grain white rice, but Haiga Mai requires slightly more water and a gentle touch so the delicate germs don’t break off during washing.
1. Gentle Washing (Rinse Quickly & Lightly)

Place your rice in a bowl. Pour in cold water, give it one immediate swish, and discard the water right away—rice absorbs liquid rapidly on first contact, so discarding the first rinse removes superficial dust fast.
Rinse gently 2 to 3 times by swirling lightly with your fingers. Do not rub or scrub the grains vigorously, or you risk knocking the nutrient-rich germ off the kernel.
2. The Soak (45–60 Minutes)

Submerge the rice in cold water and let it soak for 45 to 60 minutes.
- Summer Note: If your kitchen is warm, let it soak inside the refrigerator to keep the water cold and prevent any off-flavors from developing.
3. Strain and Rest (15 Minutes)

Pour the soaked rice into a fine mesh strainer and let it drain completely for 15 minutes. Resting the rice allows the absorbed surface moisture to settle evenly throughout each grain before cooking.
4. Add Fresh Water & Cook

Transfer the drained rice into your inner rice cooker pot. Add 150g – 160g of fresh water for every 1 cup (150g) of dry rice used (or 360g water for 2 cups).

Select the Quick Cook Mode on your rice cooker and start the cycle.
5. Fluff Immediately & Serve

Once the cooking cycle finishes, open the lid right away to let excess steam escape. Using a rice paddle, gently cut through the rice in vertical lines and fold it over to distribute the moisture evenly.
How to Cook Haiga Mai in a Donabe Clay Pot

If you want to elevate your rice to restaurant-quality, cooking it in a traditional double-lidded rice-cooking donabe yields incredibly plump, sweet, and fragrant grains with a beautiful sheen.
1. Hydrate and Rest the Rice

Follow the same gentle washing and soaking steps as the rice cooker method: Rinse 300g of Haiga Mai gently 2 to 3 times, taking care not to knock off the delicate germs. Submerge and soak in cold water for 50 to 60 minutes. Strain thoroughly through a fine-mesh sieve and let the rice rest and drain for 15 minutes.
2. Assemble in the Donabe

Transfer your hydrated, rested rice into the donabe. Pour in 300g–320g of fresh water. Using your hand or a spatula, gently flatten the rice so it sits in a perfectly even, level layer.
3. Cook on Medium-High (12- 14 Minutes)
Cook on Medium-High (13 Minutes). Place both lids on your donabe (if using a double-lidded style). Place it over a gas stovetop on medium-high heat and set a timer for 13 minutes.
Storage & Freezing Tips

- Avoid Long “Keep Warm” Cycles: Haiga Mai tends to dry out or turn yellow faster than white rice when left on the “Keep Warm” setting.
- Best Freezing Method: Wrap individual portions tightly in plastic wrap while still hot and freshly steamed to trap the moisture. Once cooled to room temperature, transfer them to the freezer. Reheat in the microwave for a fresh-cooked texture!
Frequently Asked Questions
Q: Is Haiga Mai (Germ Rice) the same as GABA Rice?
A: Not quite!
- Haiga Mai (胚芽米): Partially polished rice where the brown outer bran layer is removed, but the germ (embryo) is left intact. It cooks quickly and has the soft, fluffy texture of white rice with boosted vitamins and moderate GABA.
- GABA Rice / Sprouted Brown Rice (発芽玄米 – Hatsuga Genmai): Whole brown rice (bran included) that has been soaked in warm water until it physically sprouts, triggering an enzymatic process that boosts GABA to extremely high levels. It retains the chewy texture of whole brown rice and takes much longer to cook.
Q: What is the difference between Haiga Mai and Buzukimai (分づき米)?
A: It comes down to the milling technique:
- Buzukimai (分づき米): Partially polished rice categorized by percentage (3-bu, 5-bu, or 7-bu). It strips away both the bran and the germ simultaneously in stages, leaving a slightly chewy, whole-grain texture.
- Haiga Mai (胚芽米): Uses a specialized milling technique designed to strip 100% of the tough brown bran while keeping over 80% of the nutrient-rich germ intact. You get 100% of the soft, delicate mouthfeel of white short-grain rice with none of the brown bran chewiness!

How to Cook Haiga Mai (Germ Rice)
Ingredients
For Rice Cooker Method
- 150 g Haiga rice (Japanese germ-retained rice)
- 150 – 160 g Water (adjust to desired firmness)
For Donabe Method
- 150 g Haiga Rice (Japanese germ-retained rice)
- 170 – 180 g Water (adjust to desired firmness)
Instructions
Preparation (Essential for Both Methods)
- Rinse Gently: Place the dry Haiga rice in a bowl. Pour in cold water, give it one quick swish, and discard the water immediately to wash away surface dust. Repeat gently 2 to 3 times with a light swirling motion. Do not scrub or rub the grains vigorously, or you will knock the nutrient-rich germ off the kernel.

- Soak the Rice: Submerge the rinsed rice in cold water. Soak for 45 to 60 minutes (use 50 to 60 minutes if cooking in a Donabe). (Summer Tip: If your kitchen is warm, let it soak inside the refrigerator to prevent off-flavors from developing).

- Strain and Rest: Pour the soaked rice into a fine-mesh strainer and let it drain completely for 15 minutes. This resting time helps distribute the absorbed surface moisture evenly before cooking.

Option A – Rice Cooker Method
- Measure Water: Transfer the hydrated, strained rice into your rice cooker inner pot. Add 170g to 180g of fresh water for every 1 cup (150g) of dry rice (e.g., 340g to 360g water for a 2-cup batch).

- Cook: Select the Quick Cook Mode on your rice cooker and start the cycle.

- Fluff: Once the cooking cycle finishes, open the lid immediately, cut through the rice gently with a rice paddle, and fold it over to release excess trapped steam.

Option B – Donabe (Earthenware Clay Pot) Method
- Assemble: Add 300g of hydrated, rested rice and 350g of fresh water into your donabe pot. Gently level the surface of the rice with your hand or a spatula.

- Cook: Cover the donabe with both lids (if double-lidded) and place over a gas stovetop on medium-high heat for 13 minutes.

- Steam: Turn off the heat immediately after 13 minutes. Do not lift the lids! Let the donabe sit completely undisturbed on the burner for 10 minutes to steam.

- Fluff: Open the lids and use a rice paddle to fold and fluff the grains gently before serving.

Notes
- Texture Adjustments: For a firmer, use 170g of water per cup of dry rice. For a softer, fluffier texture, use closer to 180g of water.
- Washing Care: Haiga rice requires a much gentler wash than regular white rice. Harsh scrubbing will dislodge the rice germ (where all the nutrition and GABA are stored!).
- Freezing Tip: Avoid leaving cooked Haiga rice on the “Keep Warm” setting for long periods as it can dry out and yellow. Instead, wrap individual portions tightly in plastic wrap while hot and freeze them immediately. Reheating in the microwave will restore its fresh-cooked moisture beautifully.
