
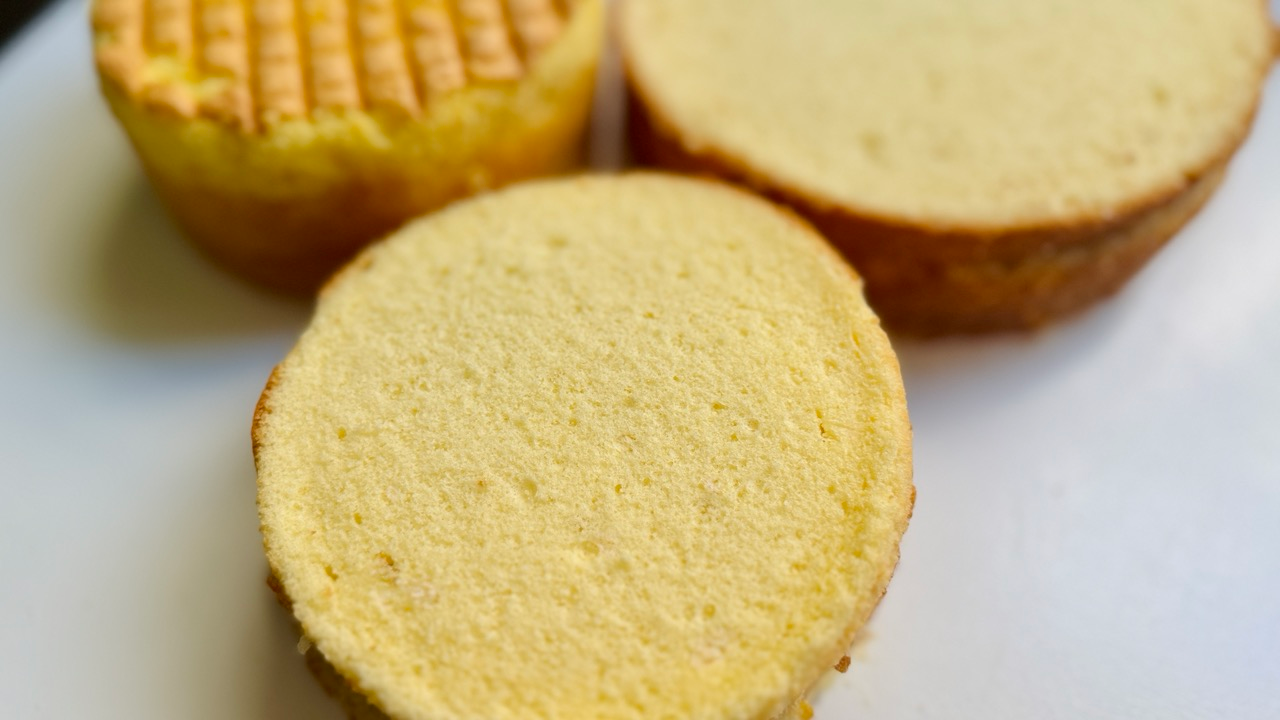
A classic Japanese sponge cake (Pâte Génoise) relies entirely on egg aeration for its rise. As a result, the sponge develops an ultra-light texture without any chemical leavening. Modern stand mixers whip room-temperature eggs into a stable foam within minutes. Therefore, you can skip the traditional double boiler method entirely.
Over years of professional baking, I refined this sponge formula specifically for Japanese-style shortcakes. In particular, extra egg yolks and heavy cream create an elastic crumb. Consequently, the cake absorbs fruit syrups and holds fresh whipped cream without collapsing.
Why This Japanese Sponge Cake Recipe Works

- Modern Mixer Efficiency: No water bath required. Modern motors build dense, stable egg foam at room temperature, streamlining your prep time.
- Heavy Cream & Butter Emulsion: Combining warm heavy cream with melted butter lowers fat density. As a result, it folds into delicate egg foam seamlessly without deflating air bubbles.
- Extra Egg Yolks: Additional yolk protein and natural lecithin enrich the crumb structure. Therefore, the sponge gains an elastic texture that slices cleanly into ultra-thin layers.
- Bubble Stabilization: Shifting to low-medium speed at the end removes large, irregular air pockets. Consequently, you get a uniform, velvety crumb.
Japanese Sponge Cake vs. American Sponge Cake

Why is a Japanese sponge cake so different from a classic American sponge? The main differences lie in the leavening method and the crumb structure.
For example, American sponge cake recipes typically rely on baking powder for their lift. In contrast, authentic Japanese Pâte Génoise uses zero baking powder. Instead, it depends completely on whipped egg micro-bubbles and low-protein flour (hakurikiko). As a result, the Japanese version feels noticeably softer, lighter, and melts on your tongue alongside whipped cream.
Master Pan Scaling Chart (6, 7, and 8-Inch Pans)

Use this reference table to adapt the master recipe to your specific round cake pan size:
| Ingredient / Variable | 6-Inch (15cm) Baseline Base | 7-Inch (18cm) Mold | 8-Inch (20cm) Mold |
| Scaling Factor | 100% (1.0x) | ~136% (1.36x) | ~178% (1.78x) |
| Whole Eggs | 112g (2 large + 12g) | 153g (3 large) | 200g (4 large) |
| Egg Yolks | 28g (~1.5 yolks) | 38g (~2 yolks) | 50g (~2.5 yolks) |
| Granulated Sugar | 100g | 138g | 180g |
| Pastry / Cake Flour | 78g | 107g | 140g |
| Unsalted Butter | 17g | 23g | 30g |
| Heavy Cream | 11g | 15g | 20g |
| Commercial Convection Oven / Precise Modern Oven | 8 min @ 330°F (165°C) + 18–22 min 315°F (157°C) | 8 min @ 330°F (165°C) + 22–26 min @ 315°F (157°C) | 8 min @ 330°F (165°C) + 25–30 min 315°F (157°C) |
| Home Conventional Oven | 8 min @ 340°F (170°C) + 18–22 min @ 325°F–320°F (163°C–160°C) | 8 min @ 340°F (170°C) + 22–26 min @ 325°F–320°F (163°C–160°C) | 8 min @ 340°F (170°C) + 25–30 min @ 325°F–320°F (163°C–160°C) |
Step-by-Step Instructions (6-Inch Batch)
1.Prep Equipment & Oven

Preheat your home oven to 340°F (170°C) to account for heat loss when opening the door. Line the bottom and sides of a 6-inch round cake pan with parchment paper. Sift your cake flour twice to ensure thorough aeration.
2. Prepare the Fat Emulsion

Melt the unsalted butter in a small heatproof bowl, then stir in the heavy cream until fully combined. Keep this mixture warm (around 120°F / 50°C) over a warm water bath so it remains fluid.
3. Pre-Mix & Whip to Ribbon Stage


Add room-temperature whole eggs, egg yolks, and granulated sugar to a clean bowl. First, whisk thoroughly by hand to prevent sugar from drawing moisture out of the yolks. Next, switch to your electric mixer:


Hand Mixer: Whip on high speed for 7 to 9 minutes. Whip until the batter expands in volume, turns pale cream, and forms a thick ribbon that holds its shape for a few seconds.

Stand Mixer: Whip on high speed for 5 to 7 minutes.
4. Stabilize the Micro-Foam


Turn the mixer down to medium-low speed and continue whisking for 2 to 3 minutes. Because this step shears large air pockets into fine micro-bubbles, it creates a velvety foam that will not collapse during folding.
5. Fold in the Flour:

Sift the pastry flour over the egg foam in two additions. Fold gently and quickly with a silicone spatula, cutting down the center, sweeping around the bowl, and turning your wrist until no dry flour pockets remain.
6. Sacrifice Batter & Emulsify Swiftly:


Scoop a small cup of batter into the warm butter and cream mixture and whisk vigorously until smooth. Pour this butter-batter mixture back down the side of the main bowl. Fold gently from the bottom of the bowl until homogeneous. Work as quickly as possible during this step, as the fat begins deflating the egg foam immediately.
7. Bake Immediately: Do not let the batter sit on the counter.


Pour the batter into your prepared mold from a low height. Place it directly into the oven without delay.
Home Conventional Oven: 8 min @ 340°F (170°C) + 18–22 min @ 325°F–320°F (163°C–160°C)
Commercial / Convection Oven: 8 min @ 330°F (165°C) + 18–22 min @ 320°F–315°F (160°C–157°C)
8. Shock and Invert:


Immediately upon removing from the oven, drop the pan firmly onto the counter from 2–3 inches high to release trapped steam. Remove the cake from the mold while hot and cool upside down on a parchment-lined rack.
Professional Baker’s Tips

-Skip the Warm Water Bath (A Quick Method Update)
In my 2021 basic Genoise post, I taught the traditional double-boiler method. However, modern mixers deliver enough mechanical power on their own. Therefore, room-temperature eggs whip into a dense, stable foam without extra heat.

–Speed is Critical After Adding Fat
Once the tempered butter and cream mixture is folded into the batter, the clock starts ticking. Lipids rapidly weaken the protein structure of whipped eggs, causing the batter to lose volume every second it sits. Work swiftly and get the pan straight into the oven.

–Flour Selection Matters (The Nisshin Violet Difference)
For an authentic patisserie texture, I highly recommend using Nisshin Violet Flour (Hakurikiko). Japanese cake flour is milled to an exceptionally fine granule with a low protein content (~7.8%). As a result, the sponge achieves an impossibly soft crumb. However, standard American cake flour (such as Swans Down or Softasilk) works as a reliable direct substitute.

–Home Oven Calibration (Commercial Convection vs. Home Oven)
At the bakery, I rely on high-powered commercial convection ovens where forced air circulation transfers heat with extreme efficiency. In my home apartment oven, however, I found that setting the temperature 10°F higher—baking at 340°F (170°C) for the initial 8 minutes, then lowering to 325°F (163°C)—produces the same volume and tender crumb as my commercial setup. Because older conventional ovens lose significant heat when opened and lack air circulation, don’t hesitate to bump your temperature dial up by 10°F if your home oven tends to run gentle or cool.
How to Slice Your Sponge Cake Like a Pro

Slicing a delicate Japanese sponge cake into uniform, level layers does not require expensive cake levelers or mandatory chilling in the refrigerator. As long as the cake has cooled completely to room temperature, you can achieve clean, crumb-free slices with proper knife technique:
1.Cool Completely First: Never slice a warm sponge, as the soft crumb will collapse. Ensure the cake has cooled entirely to room temperature. While chilling is optional, a room-temperature sponge slices beautifully on its own.


2.(Optional) Trim Top & Bottom Crusts (Yakittura): Before setting up guides, you can trim off the paper-thin browned skin on the top—known in Japanese bakeries as yakittura (焼きっつら)—as well as the thin bottom crust. Hold your serrated knife flat and use gentle freehand strokes to slice off just a razor-thin layer without using any guides. While optional, removing these skins creates a perfectly uniform, pale yellow crumb and allows soaking syrup to absorb much more evenly.

3. Set Toothpick Guides: Place the sponge on a turntable or cake board. Using a ruler, measure your desired layer height (typically 1.5 cm for classic shortcake). Insert 4 to 6 toothpicks horizontally around the perimeter of the cake at that exact height.

4.Score the Outer Edge: Rest your fine-serrated knife horizontally against the toothpicks. Rotate the turntable slowly while cutting a light, shallow guideline around the outer perimeter of the cake.

5. Slice Straight Through: Using your scored line as a track, keep the knife perfectly level and slice through to the center with smooth, steady slicing strokes without pushing the cake.

6. Separate Carefully: Gently slide a cake lifter or flat cutting board under the sliced layer to lift it off cleanly. Repeat for the next layer.
How to Store and Freeze Sponge Cake

Once your sponge cake has cooled completely to room temperature, immediately cover it tightly in plastic wrap to trap in moisture and prevent the delicate crumb from drying out.
- Room Temperature (1 to 2 Days): If you plan to assemble your cake the same day or the next day, keep the wrapped sponge at cool room temperature away from direct sunlight.
- Refrigerator (3 to 5 Days): Store the tightly wrapped sponge in the fridge for up to 5 days.
- Freezer (Up to 1 Month): Wrap the sponge tightly in a double layer of plastic wrap, followed by a layer of aluminum foil or a zip-top freezer bag to protect against freezer burn. You can freeze the sponge cake whole or pre-slice it first with parchment paper tucked between layers.
Pastry Chef Tip: Creative Uses for Extra Sponge Slices

Pre-sliced frozen sponge layers are a secret weapon in the kitchen! Beyond standard layer cakes, extra sponge slices work brilliantly for:
- Mousse Cake & Cheesecake Bases: Cut slices to fit pastry rings for an instant, feather-light cake base.
- Preventing Soggy Crusts: Place a thin sponge disc along the bottom of fruit pies, cream tarts, or fruit flans before filling. The sponge acts as a hidden moisture barrier, absorbing excess fruit juices and keeping your pastry crust crispy.
Frequently Asked Questions
Q: Can I replace fine granulated sugar with brown or unrefined sugar?
A: I strongly advise against unrefined sugars. In fact, white granulated sugar (or Japanese Johakuto) is a structural ingredient that strengthens egg foam walls. Because unrefined sugars contain coarse grains, excess moisture, and molasses, they weigh down the foam and turn the crumb a dull brown color.
Q: Why is my sponge cake dense or rubbery instead of fluffy?
A: Dense Genoise usually comes down to two culprits: under-whipping the eggs or over-folding the batter. Ensure your eggs reach a thick, pale ribbon stage before adding flour. When introducing the flour and warm butter mixture, fold gently with a silicone spatula—over-mixing develops gluten and deflates the delicate air pockets created during whipping.
Q: Why does my cake have large, uneven air pockets inside?
A: Large, irregular holes occur when the whipped egg foam contains coarse, unstable bubbles. Skipping the 2 to 3-minute stabilization step on medium-low speed leaves large air bubbles in the batter, which expand unevenly in the oven. Running the mixer on lower speed shears those large pockets into a uniform, microscopic foam.
Q: What flour should I use if I can’t find Nisshin Violet?
A: While Nisshin Violet is the gold standard for Japanese shortcakes due to its low protein content (~7.8%) and fine grind, you can substitute a standard Western cake flour (around 7–8% protein). If using All-Purpose flour (~10–12% protein), substitute 20% of the flour weight with cornstarch (e.g., 112 g all-purpose flour + 28g cornstarch) and sift three times to lighten the texture.

Japanese Sponge Cake (Professional Pâte Génoise for Shortcakes)
Ingredients
6-Inch (15cm) Mold
- 112 g Whole Eggs approx. 4 large eggs, room temperature
- 28 g Egg Yolks approx. 2–3 yolks
- 100 g Granulated White Sugar or Japanese Johakuto
- 78 g Japanese Cake Flour Nisshin Violet / Hakurikiko, sifted twice (or American cake flour)
- 17 g Unsalted Butter
- 11 g Heavy Cream
Instructions
- Prep Equipment & OvenPreheat oven to 340°F (170°C). Line the bottom and sides of an 6-inch round cake pan with parchment paper. Sift the cake flour twice to ensure thorough aeration.

- Prepare Fat EmulsionMelt the unsalted butter in a small heatproof bowl, then stir in the heavy cream until fully combined. Keep warm (around 120°F / 50°C) over a warm water bath so it remains fluid.

- Pre-Mix & Whip to Ribbon StageAdd the room-temperature whole eggs, egg yolks, and granulated sugar into a clean bowl. Before turning on any power tools, pre-mix the sugar and eggs thoroughly with a regular hand whisk until homogenous—this prevents the sugar from sitting at the bottom and pulling moisture out of the egg yolks.

- Direct High-Speed WhipThen, switch to your electric mixer attachment:

- Stand Mixer: Whip on high speed for 5 to 7 minutes.

- Electric Hand Mixer: Whip on high speed for 7 to 9 minutes.Whip until the batter expands significantly in volume, turns pale cream, and forms a thick, steady ribbon that holds its shape for a few seconds when the beaters are lifted.

- Stabilize the FoamTurn mixer down to medium-low speed and continue whisking for 2 to 3 minutes. This

- This critical step shears large, erratic air pockets into fine micro-bubbles, creating a velvety foam that won't collapse when flour is introduced.

- Fold in FlourSift the pastry flour over the egg foam in two additions. Fold gently and quickly with a silicone spatula, cutting down the center, sweeping around the bowl, and turning your wrist until no dry flour pockets remain.

- Temper Fat & Fold SwiftlyScoop a small cup of batter into the warm butter and cream mixture and whisk vigorously until smooth.

- Pour this butter-batter mixture back down the side of the main bowl.

- Fold gently from the bottom of the bowl until homogeneous. Work as quickly as possible during this step, as the fat begins deflating the egg foam immediately.

- Bake ImmediatelyPour batter into prepared mold from a low height.Home Conventional Oven : 8 min at 340°F (170°C) Commercial Convection Oven / Precise Modern Oven: 8 min at 330°F (165°C)

- Then drop temperature toHome Conventional Oven: 325°F–320°F (163°C–160°C)Commercial Convection Oven / Precise Modern Oven: 320°F–315°F (160°C–157°C), And bake for an additional 18 to 22 minutes until a toothpick inserted in the center comes out clean.

- Shock and InvertImmediately upon removing from the oven, drop the pan firmly onto the counter from a height of 2–3 inches to release trapped steam and stabilize internal structure. Remove from mold while hot and cool upside down on a parchment-lined rack.

Notes
- Flour Selection: For authentic Japanese patisserie texture, use Nisshin Violet (Hakurikiko) (~7.8% protein). High-quality American cake flour (like Swans Down or King Arthur Cake Flour) is the best direct substitute. Avoid All-Purpose flour.
- Sugar Importance: Stick strictly to fine white granulated sugar or Japanese Johakuto. Unrefined sugars, brown sugar, or sugar substitutes contain excess moisture and coarse grains that destroy delicate egg foam.
- Speed with Fat: Once melted butter and cream are introduced, work quickly—lipids immediately begin deflating egg foam structure. Get the pan into the oven without delay.
- 1x: 6-inch (15cm) mold
- 2x: 8-inch (20cm) mold (or two 6-inch pans)
- 4x: 12-inch (30cm) mold
Master Pan Scaling Chart: 6-Inch (15cm) Mold [100%]: 112g Whole Eggs, 28g Yolks, 100g Sugar, 78g Flour, 17g Butter, 11g Cream
- Home Conventional Oven: 8 min @ 340°F (170°C) + 18–22 min @ 325°F–320°F (163°C–160°C)
- Commercial / Convection Oven: 8 min @ 330°F (165°C) + 18–22 min @ 320°F–315°F (160°C–157°C)
- Home Conventional Oven: 8 min @ 340°F (170°C) + 22–26 min @ 325°F–320°F (163°C–160°C)
- Commercial / Convection Oven: 8 min @ 330°F (165°C) + 22–26 min @ 320°F–315°F (160°C–157°C)
8-Inch (20cm) Mold [178%]: 200g Whole Eggs, 50g Yolks, 180g Sugar, 140g Flour, 30g Butter, 20g Cream
- Home Conventional Oven: 8 min @ 340°F (170°C) + 25–30 min @ 325°F–320°F (163°C–160°C)
- Commercial / Convection Oven: 8 min @ 330°F (165°C) + 25–30 min @ 315°F (157°C)
