
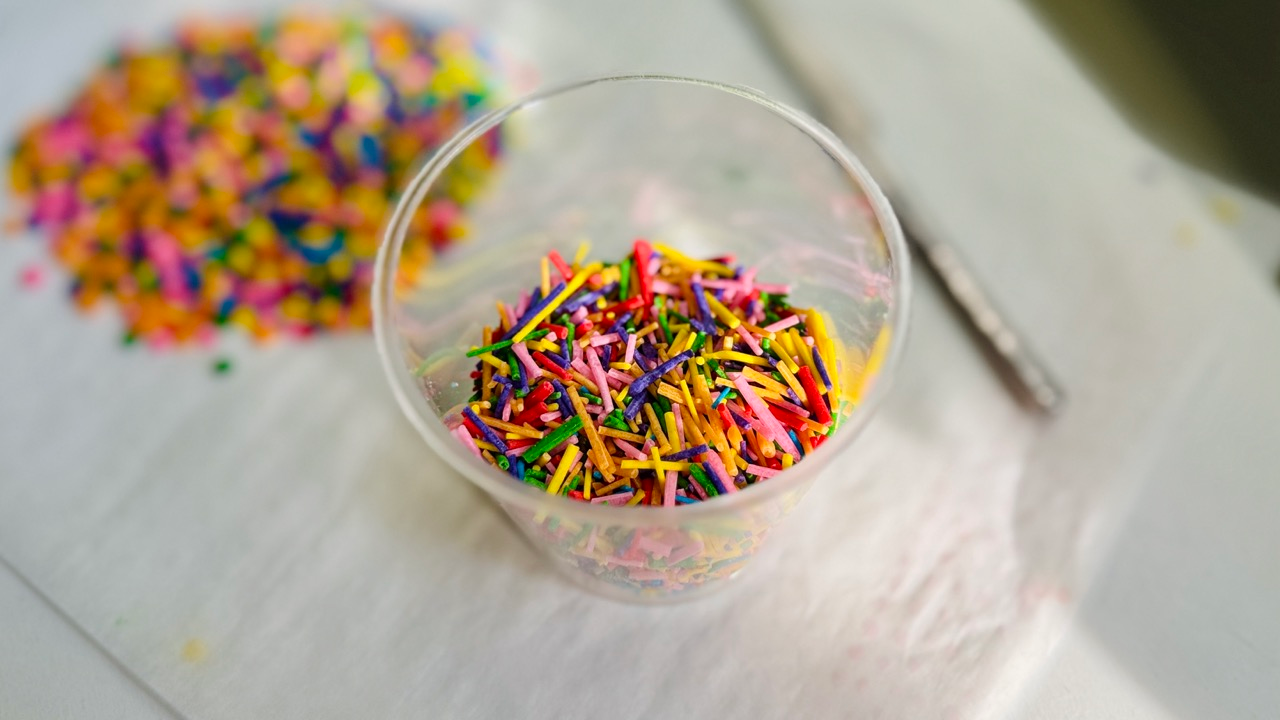
I won’t buy store-bought sprinkles ever again after realizing how easy, fun, and customizable it is to make them at home! Plus, with homemade sprinkles, you get complete control over the exact colors, shapes, and sizes you want. If you love to challenge your imagination in the kitchen, this is the ultimate creative project.
Whether you want traditional rainbow jimmies, tiny white daisy flowers, cute summer strawberries, or artistic polka dots (think Yayoi Kusama’s iconic art style!), this recipe is your canvas.
Why Make Homemade Sprinkles at Home?

- Budget-Friendly: Made with basic pantry staples—no hard-to-find specialty baking items required.
- 100% Customizable: You control the color palette, line thickness, and shapes. Custom birthday mix? Avant-garde polka dots? You name it!
- Flexible Equipment Options: While I love using my stand mixer for ease, a basic hand mixer or simply a bowl, whisk, and spatula will get the exact same delicious results!
- Long Shelf Life: They dry completely firm and can be stored for months in your pantry.
What’s the Difference Between Regular Icing and Sprinkle Icing?

If you’ve piped royal icing before, you might notice a few key differences here:
- No Egg Whites or Meringue Powder: Many traditional royal icing recipes rely on raw egg whites or meringue powder to set hard. This recipe uses corn syrup instead, making it egg-free and completely worry-free!
- Subtle & Flexibility: The corn syrup acts as a binder that gives the dried sprinkles a subtle, smooth finish rather than a chalky look—all while keeping them sturdy and flexible enough to hold detailed 3D shapes without cracking.
Ingredients for Homemade Sprinkles

This single-batch yield makes plenty of sprinkles while remaining easy to mix by hand or with a standard electric hand mixer.
- 180g to 230g Powdered sugar, sifted (Start with 180g, but keep extra on hand—adding an extra 30g–50g helps achieve the ideal stiff consistency for detailed 3D shapes)
- 20g Light corn syrup (or glucose syrup)
- 25g to 30g Warm water (plus extra drops as needed)
- 2.5g (approx. ½ tsp) Pure vanilla extract (or clear vanilla to keep bright whites pure)
- Gel Food Coloring (Preferred): Concentrated gel yields rich colors without altering the moisture level
> Note: If using liquid food coloring, you will need to add extra powdered sugar to compensate for the added liquid and maintain a stiff piping consistency.
Step-by-Step Instructions
1. Sift the Sugar

Sift your powdered sugar thoroughly into a bowl. Do not skip this step! Any tiny sugar clumps will instantly clog your small piping tips later.
2. Mix the Base

In your mixer bowl, combine about half of the sifted powdered sugar (around 100g), the corn syrup, warm water, and vanilla extract. Beat with the paddle attachment on low speed until smooth.
Chef’s Note on Equipment: While I’m using my stand mixer in the photos, don’t worry if you don’t have one! Unlike sponge cake batter or meringue, sprinkle icing doesn’t rely on incorporated air, so you don’t need intense machine power. A standard electric hand mixer or even mixing vigorously by hand with a stiff spatula or whisk works just as well.
3. Adjust for Stiff Peaks


Gradually stir in the remaining powdered sugar until you reach a medium-stiff peak consistency.
- Pro-Tip on Colorings: Gel food colors are best for bright shades without changing the texture. If you’re using liquid food coloring, make sure to aim for an even firmer, stiffer icing consistency before coloring—or add a bit of extra sifted powdered sugar right after tinting to counteract the added liquid so your lines and shapes don’t spread.
4. Divide & Color

Divide your icing into separate small bowls. Tint each bowl with gel food coloring. Cover unused bowls with a damp paper towel so the icing doesn’t form a crust while you work.
5. Pipe Your Shapes on Parchment Paper

Line your baking sheets with parchment paper and get creative!
- Classic Rainbow Jimmies: Pipe long, straight lines across the parchment paper using 7 different rainbow colors.
- Polka Dots: Pipe tiny dots in various sizes across the paper.
6. Dry Completely

Let your piped icing dry uncovered at room temperature for 24 to 48 hours. They need to be dry to the touch throughout.
7. Chop & Break!

Once completely hard, gently lift the parchment paper—the sprinkles will pop right off! Use a bench scraper, chef’s knife, or even your hands to break the long rainbow lines into small sprinkle-sized pieces.
How to Store Homemade Sprinkles

- Storage: Keep your dried sprinkles in clean, airtight glass jars or plastic containers at room temperature.
- Location: Keep them in a cool, dry place away from direct sunlight and humidity.
- Shelf Life: Because there are no dairy or egg products, they will stay fresh for up to 6 months to 1 year!

Easy Homemade DIY Sprinkles (Egg-Free)
Ingredients
- 180 to 230 g Powdered sugar sifted (start with 180g; reserve extra to stiffen consistency for 3D shapes)
- 20 g Light corn syrup or glucose syrup
- 25 to 30 g Warm water plus extra drops as needed
- 2.5 g Pure vanilla extract or clear vanilla
- Gel food coloring
Instructions
- Sift the powdered sugar thoroughly into a bowl. Do not skip this step, as even tiny lumps will clog fine piping tips later.

- In a mixer bowl (or large mixing bowl), combine about half of the sifted powdered sugar (around 100g), the corn syrup, warm water, and vanilla extract. Beat with the paddle attachment on low speed (or whisk vigorously by hand) until completely smooth.

- Gradually add the remaining powdered sugar until you reach a medium-stiff peak consistency. For detailed 3D shapes like daisy petals, strawberries, or sharp lines, add an additional 30g to 50g of powdered sugar until the icing holds a firm, upright peak without slumping.

- Divide the icing into small separate bowls and tint each bowl using gel food coloring. Keep unused bowls covered with a damp paper towel to prevent a crust from forming.

- Line baking sheets with parchment paper. Transfer colors into piping bags fitted with fine round tips (or snip a tiny corner off the bag).

- Pipe long, thin, straight lines across the parchment paper.

- Polka Dots: Pipe tiny dots in various sizes.
- Allow the piped shapes to dry uncovered at room temperature for 24 to 48 hours until completely hard to the touch throughout.

- Gently lift the parchment paper from underneath—the sprinkles will pop right off. Use a bench scraper, chef’s knife, or your fingers to break long lines into uniform sprinkle-sized pieces.

Notes
- Equipment Flexibility: An 8-quart stand mixer works great for larger or doubled batches, but a standard electric hand mixer or mixing vigorously by hand with a stiff spatula works just as well. Sprinkle icing doesn’t rely on whipped air structure.
- Consistency Control: If piping delicate shapes like strawberries or daisy petals, keep the icing firmer by mixing in extra powdered sugar 10g at a time. If lines break too easily while piping, add warm water drop-by-drop.
- Liquid vs. Gel Food Coloring: Gel food coloring is preferred because it provides vibrant color without diluting the icing. If you choose to use traditional liquid food coloring, keep in mind that the extra liquid will thin out your batch. Be sure to mix in additional powdered sugar to keep the icing on the stiffer side so your piped shapes hold their dimension.
- Achieving Commercial High Gloss: These sprinkles set with a clean, smooth semi-matte finish. If you prefer a lacquer-like commercial gloss, toss the fully dried sprinkles in a glass bowl with a single drop of confectioner’s glaze (edible shellac) or spray with edible gloss spray before storing.
- Storage: Store dried sprinkles in an airtight glass jar or container at room temperature away from moisture and direct sunlight. They stay fresh for 6 months to 1 year.
